Tuesday, December 18, 2018

An update of sorts

Hi all,

Just posting some little jobs I've been working on

Recently painted a Classic Brass C32 in lined black. Quite a satisfying job which is easier to do than most think. It will be finished as 3237, circa 1967 with Cardiff numbers.

Also commenced renumbering an Auscision 48cl. They are wonderful models, quite simply amazing.

Anyway, some photos of these projects.

Brass locos look good either unpainted or painted. There is no happy medium!!! 

Painted backhead and cab. The backhead is painted black and anywhere brass needs to be exposed, it's scraped back with a sharp blade. Cab walls painted in Raileys 120 Larch Green. 

The numbers got slightly botched while fixing a thumb print in the clear coat. It'll be fine once I touch the numbers up very delicately. 

Tuesday, December 11, 2018

Altering the Austrains C35

Austrains have long been in the Australian 'ready to run' market and have brought out some fantastic models in that time. Be it the dead on dimensionally 80cl to the NR's which have sold the most units of any Australian outline RTR diesel (correct me if I'm wrong) to the C36 and eventually C35.

The 36's and 35's have a split chassis which can be a bit tedious for those fitting sound but a really good and reliable model. 

The 35's came to be in late 2007 and are a really nice model. Pretty close dimensionally and they have really nice running performance, same as the 36. However, same as the 36, they are missing some bits of detail. 

I'm not trying to have an accurate 35 but something that can sit alongside other models and look fairly reasonable is all I expect. 

The stuff that is missing is basically just electrical conduit and some lube lines which are easily fabricated out of 0.3mm wire. 


The conduit for the headlights from the cab to the smokebox where there is a J box to run to either the marker lights or the headlight just for power. I didn't put any effort into replicating the J box, however a small blob of solder would neatly give the impression of the box. 

The wire was held down with brackets made out of finely cut pieces of printer paper and glued down. Where I couldn't use brackets, I used UV activated glue. That is some of my favourite stuff to work with as it dries clear and is easy to work with. 

Following those alterations, I removed the headlight and cut the headlight off the base, and moved it back. It's an easy way to change the appearance of an unsightly large headlight. 

I then proceeded to commence renumbering it 3526, as I had wanted a model of 3526 in green for quite some time.


Anyway, the loco is going to have the QSI sound removed eventually in favour for my personal favourite decoders from Soundtraxx. 

Hope you all got some ideas to create a nicer looking 35cl .

Cheers, Mick. 

Friday, November 30, 2018

More weathering!

Two posts within minutes of eachother, you'd be right to think I have nothing better to do!

A lot of modellers I notice have fantastic looking trains but with no weathering. To me it used to be something I didn't think about, but as I have been more into weathering my fleet of wagons and carriages I deemed it time to give some of my locos some dirt.

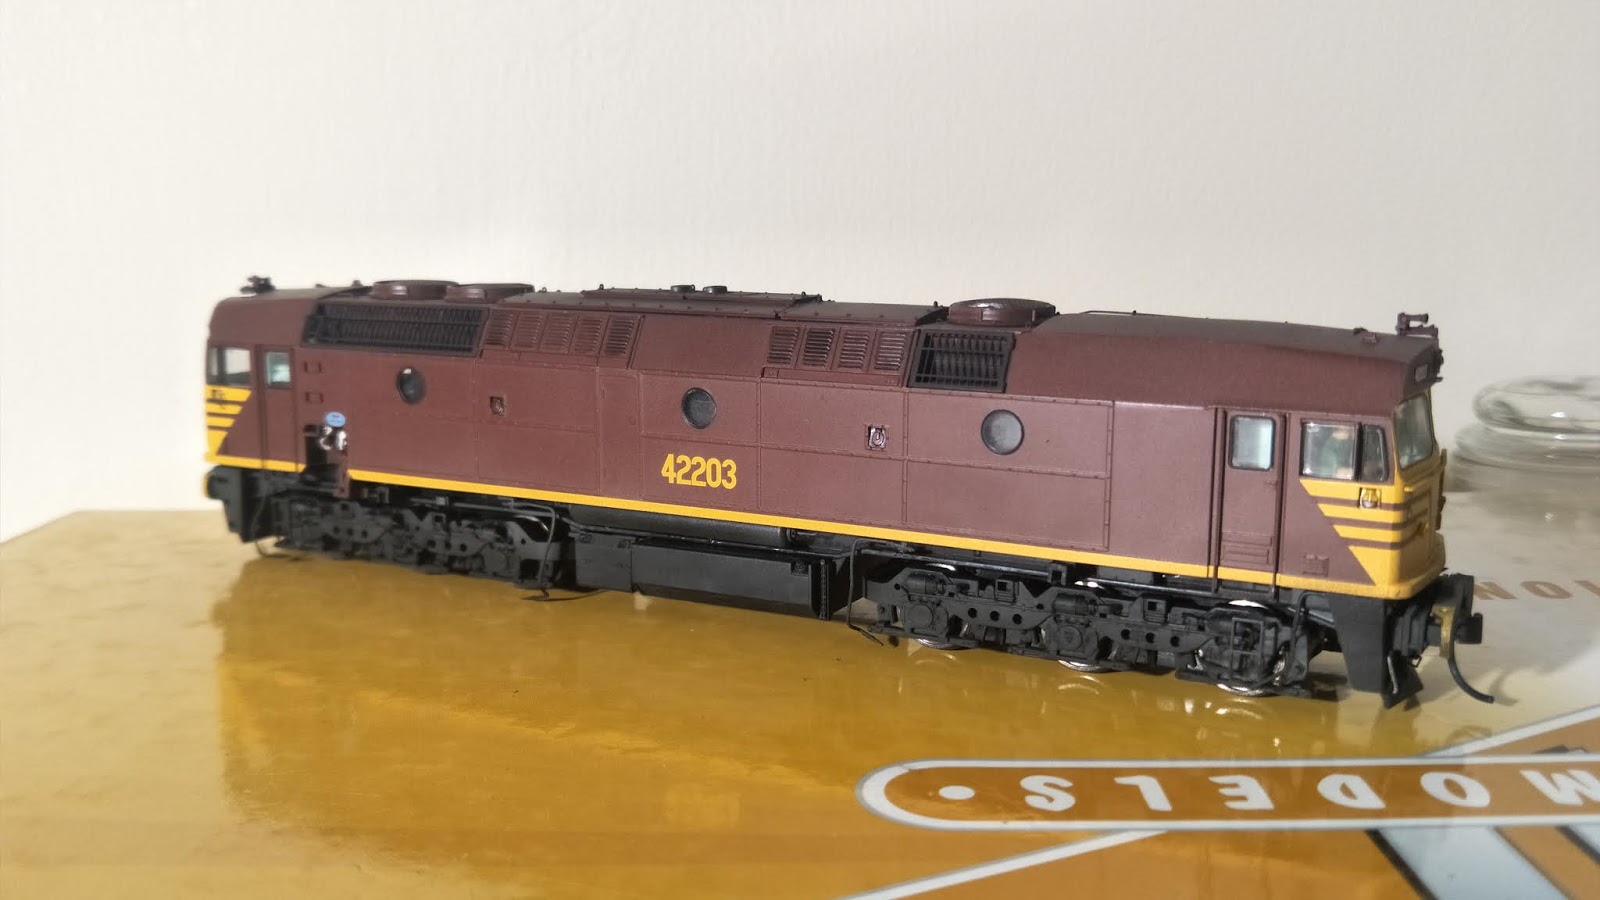
For this I'm using Auscision locos, and airbrushed Tamiya paints. The Auscision locos are top of the game, and they look great once weathered. It's a simple way to do it, and gives realistic results.

The premise behind using the Tamiya paints is they are extremely forgiving to work with. Acrylic paint can be washed away if you make a mistake, which if you're doing weathering for the first time you're more than likely going to do so as harsh as that may sound.

Before weathering I will fit Kadee No. 153 short shank whisker couplers. It's a modification that is a matter of taste, but that's mine. When fitting them, I will take a small cut out of the right hand side of the box to give the coupler more clearance and movement. The buffing plates will pretty much touch between locos and work on corners, it looks very nice. I'll touch on the modification more in a later update.

With the 421 and 422 to begin with I remove the body from the chassis. I think it's easier to focus on 2 parts instead of a whole item to begin with. Later on the two will be weathered together. A key note, I will not weather at more than 25psi for those who wish to know. I began by spraying some XF52 Flat Earth thinned with Tamiya X20A thinners (which I use with all of the paints airbrushed) across the underframe, around the bogies, pilots and anywhere road grime will fly up. From experience ballast dust and sanding dust from desanding equipment will make quite a mess, quite fast.

If you go too hard, a light coat of XF1 Flat Black brings things back to normalised proportions.

Once the chassis is satisfactory, I will reinstall the chassis and begin to hit the bottom of the body with XF52 Flat Earth to emulate some road grime again, which is normally a pretty light coat again. Not too heavy, just subtle.

Around the radiator vents or any intakes, I will ask off and give a thin and light coat of XF52 Flat Earth and XF1 Flat Black sprayed over the lot.

Occassionally I'll lightly spray the XF54 Sea Grey just to emulate some sun bleaching of the paint, but XF52 Flat Earth lightens it fine.

The roof will then get a light misting of XF52 Flat Earth and then some XF1 Flat Black  to give the look of exhaust soot.

I finish up with just going over everything really lightly with XF52 Flat Earth and cleaning all the windows of over spray. Fuel stains are brush painted with straight XF1 Flat Black and then a little bit of gloss (Humbrol or anything) is added after Testors Dullcoat. Dullcoat is applied, and the windows are cleaned once more.

I typically seal with Testors Dullcoat as it has a really flat finish. It is however humidity sensitive so you have to be sure your paint is dry before applying it.

Similar process was done to my 421 however I kept it lighter.

A video would give a better description than my words could, but don't be afraid to try it on a piece of rollingstock that isn't worth much to muster the guts up to giving weathering a go.

Cheers, Mick.


The subtle art of weathering

Hi all,

Today's my first actual post onto my blog, which gives me an opportunity to share some of my modeling.

Of late I've been engrossed in weathering which could be a good thing, also a bad thing. Of the things that have recently taken priority, has been some of my Austrains WHX wagons which are weathered to represent a late 70's rake mixed with BWH's. There are photos of this running as an export rake floating around on the internet, but they're a rarity to find.

For the weathering I have used only Tamiya paints, as I found they seem to be the easiest to work with. I had initially tried to weather the rake with powders in which wasn't a satisfactory result.

To start, the code boards are all masked off. In some cases, as are the worms. Tamiya XF54 Sea Grey is then airbrushed across the whole wagon to remove the silver finish, or in this case dull it down entirely.

From there I will remove the masking and we have a grey wagon. From there I use Tamiya XF10 flat brown and XF52 Flat Earth to weather the brake gear, side sills and the ends of the wagons including the bogies. It's a really simple process with good results.

I also have done some sprucing up of my mail train. The carriages are a mix of all, kitbashed Lima cars, Eureka, Workshop 5 and Austrains cars. All have had malthoid roofs applied (10mm Tamiya masking tape sprayed with Testors silver.

All weathered with XF10 and XF52 airbrushed with about 2 parts paint to 3 parts thinner.

Thanks all,

Mick.


Tuesday, October 16, 2018

Something a tad different

Hi all,

Recently as I have been discussing with fellow modellers I have taken it upon myself to create a blog to showcase my modelling I do on a semi regular basis.

My modelling inspiration is unfortunately very varied, which causes me the issue that no matter what I have, I cannot model a specific time period or location within a layout. That is a bit of a headache.
However, the models I have (and will showcase on this blog) will hopefully encourage people to look at their models differently and approach them in a different way.

Anyway, the specific eras I model are listed here.
1855, the first 'official' train from Sydney to Parramatta, with a NSWGR '1' class.
1937-1955. The Venetian Red and Russet liveried N cars.
1962-1975. Steam era NSWGR. A mixture of locomotive hauled passenger trains, coal trains and goods trains.
1975-1985, 3 letter code coal, grain and goods trains. Diesel era and South Maitland Railways.
1988-2015. General preserved trains. Austeam '88, 3801 Limited, LVR, NSWRTM and other operators.
2017-present. Any trains I have taken an interest too in my general viewing.

I hope you will all come along and enjoy the musings of what I have worked on, and will continue to work on.

Cheers